
Introduction
TLS, or transport layer security, and its predecessor SSL, secure sockets layer, are secure protocols created in order to place normal traffic in a protected, encrypted wrapper.
These protocols allow traffic to be sent safely between remote parties without the possibility of the traffic being intercepted and read by someone in the middle. They are also instrumental in validating the identity of domains and servers throughout the internet by establishing a server as trusted and genuine by a certificate authority.
In this guide, we'll cover how to create a self-signed SSL certificate for Apache on an Ubuntu 14.04 server, which will allow you to encrypt traffic to your server. While this does not provide the benefit of third party validation of your server's identity, it fulfills the requirements of those simply wanting to transfer information securely.
Prerequisites
Before you begin, you should have some configuration already taken care of.
We will be operating as a non-root user with sudo privileges in this guide. You can set one up by following steps 1-4 in our Ubuntu 14.04 initial server setup guide.
You are also going to need to have Apache installed. If you don't already have that up and running, you can quickly fix that by typing:
sudo apt-get update
sudo apt-get install apache2
Step One — Activate the SSL Module
SSL support actually comes standard in the Ubuntu 14.04 Apache package. We simply need to enable it to take advantage of SSL on our system.
Enable the module by typing:
sudo a2enmod ssl
After you have enabled SSL, you'll have to restart the web server for the change to be recognized:
sudo service apache2 restart
With that, our web server is now able to handle SSL if we configure it to do so.
Step Two — Create a Self-Signed SSL Certificate
Let's start off by creating a subdirectory within Apache's configuration hierarchy to place the certificate files that we will be making:
sudo mkdir /etc/apache2/ssl
Now that we have a location to place our key and certificate, we can create them both in one step by typing:
sudo openssl req -x509 -nodes -days 365 -newkey rsa:2048 -keyout /etc/apache2/ssl/apache.key -out /etc/apache2/ssl/apache.crt
Let's go over exactly what this means.
- openssl: This is the basic command line tool provided by OpenSSL to create and manage certificates, keys, signing requests, etc.
- req: This specifies a subcommand for X.509 certificate signing request (CSR) management. X.509 is a public key infrastructure standard that SSL adheres to for its key and certificate managment. Since we are wanting to create a new X.509 certificate, this is what we want.
- -x509: This option specifies that we want to make a self-signed certificate file instead of generating a certificate request.
- -nodes: This option tells OpenSSL that we do not wish to secure our key file with a passphrase. Having a password protected key file would get in the way of Apache starting automatically as we would have to enter the password every time the service restarts.
- -days 365: This specifies that the certificate we are creating will be valid for one year.
- -newkey rsa:2048: This option will create the certificate request and a new private key at the same time. This is necessary since we didn't create a private key in advance. The
rsa:2048tells OpenSSL to generate an RSA key that is 2048 bits long. - -keyout: This parameter names the output file for the private key file that is being created.
- -out: This option names the output file for the certificate that we are generating.
When you hit "ENTER", you will be asked a number of questions.
The most important item that is requested is the line that reads "Common Name (e.g. server FQDN or YOUR name)". You should enter the domain name you want to associate with the certificate, or the server's public IP address if you do not have a domain name.
The questions portion looks something like this:
Country Name (2 letter code) [AU]:US
State or Province Name (full name) [Some-State]:New York
Locality Name (eg, city) []:New York City
Organization Name (eg, company) [Internet Widgits Pty Ltd]:Your Company
Organizational Unit Name (eg, section) []:Department of Kittens
Common Name (e.g. server FQDN or YOUR name) []:your_domain.com
Email Address []:your_email@domain.com
The key and certificate will be created and placed in your
/etc/apache2/ssl directory.Step Three — Configure Apache to Use SSL
Now that we have our certificate and key available, we can configure Apache to use these files in a virtual host file. You can learn more about how to set up Apache virtual hosts here.
Instead of basing our configuration file off of the
000-default.conf file in the sites-availablesubdirectory, we're going to base this configuration on the default-ssl.conf file that contains some default SSL configuration.
Open the file with root privileges now:
sudo nano /etc/apache2/sites-available/default-ssl.conf
With the comments removed, the file looks something like this:
<IfModule mod_ssl.c>
    <VirtualHost _default_:443>
        ServerAdmin webmaster@localhost
        DocumentRoot /var/www/html
        ErrorLog ${APACHE_LOG_DIR}/error.log
        CustomLog ${APACHE_LOG_DIR}/access.log combined
        SSLEngine on
        SSLCertificateFile /etc/ssl/certs/ssl-cert-snakeoil.pem
        SSLCertificateKeyFile /etc/ssl/private/ssl-cert-snakeoil.key
        <FilesMatch "\.(cgi|shtml|phtml|php)$">
                        SSLOptions +StdEnvVars
        </FilesMatch>
        <Directory /usr/lib/cgi-bin>
                        SSLOptions +StdEnvVars
        </Directory>
        BrowserMatch "MSIE [2-6]" \
                        nokeepalive ssl-unclean-shutdown \
                        downgrade-1.0 force-response-1.0
        BrowserMatch "MSIE [17-9]" ssl-unclean-shutdown
    </VirtualHost>
</IfModule>
This may look a bit complicated, but luckily, we don't need to worry about most of the options here.
We want to set the normal things we'd configure for a virtual host (ServerAdmin, ServerName, ServerAlias, DocumentRoot, etc.) as well as change the location where Apache looks for the SSL certificate and key.
In the end, it will look something like this. The entries in red were modified from the original file:
<IfModule mod_ssl.c>
    <VirtualHost _default_:443>
        ServerAdmin admin@example.com
        ServerName your_domain.com
        ServerAlias www.your_domain.com
        DocumentRoot /var/www/html
        ErrorLog ${APACHE_LOG_DIR}/error.log
        CustomLog ${APACHE_LOG_DIR}/access.log combined
        SSLEngine on
        SSLCertificateFile /etc/apache2/ssl/apache.crt
        SSLCertificateKeyFile /etc/apache2/ssl/apache.key
        <FilesMatch "\.(cgi|shtml|phtml|php)$">
                        SSLOptions +StdEnvVars
        </FilesMatch>
        <Directory /usr/lib/cgi-bin>
                        SSLOptions +StdEnvVars
        </Directory>
        BrowserMatch "MSIE [2-6]" \
                        nokeepalive ssl-unclean-shutdown \
                        downgrade-1.0 force-response-1.0
        BrowserMatch "MSIE [17-9]" ssl-unclean-shutdown
    </VirtualHost>
</IfModule>
Save and exit the file when you are finished.
Step Four — Activate the SSL Virtual Host
Now that we have configured our SSL-enabled virtual host, we need to enable it.
We can do this by typing:
sudo a2ensite default-ssl.conf
We then need to restart Apache to load our new virtual host file:
sudo service apache2 restart
This should enable your new virtual host, which will serve encrypted content using the SSL certificate you created.
Step Five — Test your Setup
Now that you have everything prepared, you can test your configuration by visiting your server's domain name or public IP address after specifying the
https:// protocol, like this:https://server_domain_name_or_IP
You will get a warning that your browser cannot verify the identity of your server because it has not been signed by one of the certificate authorities that it trusts.
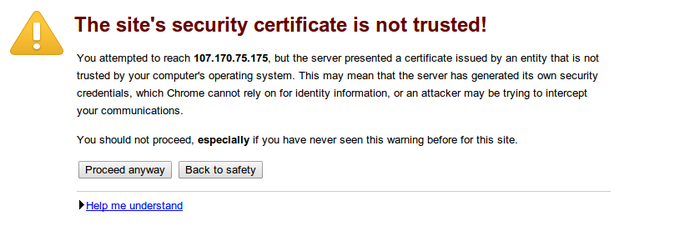
This is expected since we have self-signed our certificate. While our certificate will not validate our server for our users because it has had no interaction with a trusted certificate authority, it will still be able to encrypt communication.
Since this is expected, you can hit the "Proceed anyway" button or whatever similar option you have in your browser.
You will now be taken to content in the
DocumentRoot that you configured for your SSL virtual host. This time your traffic is encrypted. You can check this by clicking on the lock icon in the menu bar: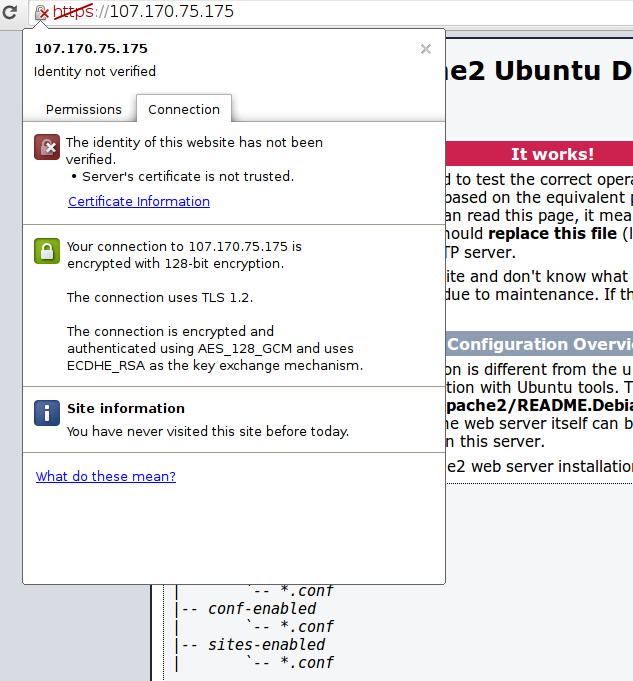
You can see in the middle green section that the connection is encrypted.
Conclusion
You should now have SSL enabled on your website. This will help to secure communication between visitors and your site, but it will warn each user that the browser cannot verify the validity of the certificate.
If you are planning on launching a public site and need SSL, you will be better off purchasing an SSL certificate from a trusted certificate authority.
If you want to learn more about how to configure Apache, click here. Check out this link for more ideas on how to secure your Linux server.


Publicar un comentario